
Leak detection report checklist: what to include before sending
A practical structure for documenting a leak investigation: case details, locations, findings, methods, photos, conclusion, recommendations, and completed actions.
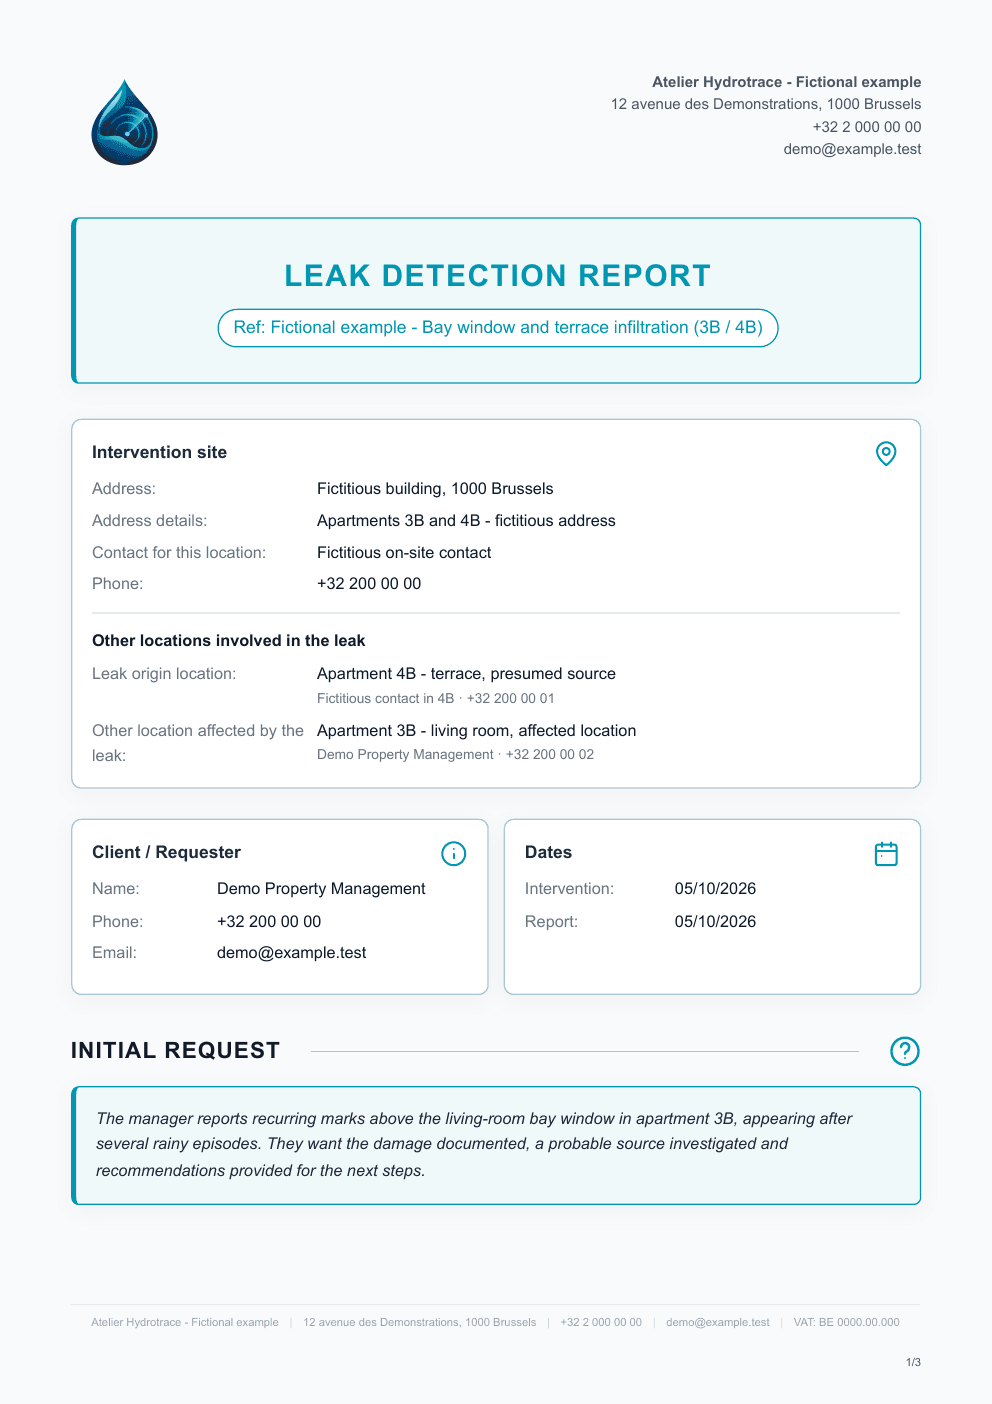
A leak detection report should be understandable without an oral explanation from the technician. The reader should quickly find where the problem is, what was checked, what was observed, and what should happen next.
There is no single format that fits every case. The structure below is a reliable starting point.
The structure at a glance
| Section | What it should make clear | Common mistake |
|---|---|---|
| Case identification | Which case is this? | Address, date, or requester is hard to find |
| Reason for the visit | Why was the intervention requested? | Presenting a hypothesis as a fact |
| Locations involved | Where are the damages and where is the suspected source? | Mixing up the affected person, affected location, and source |
| Findings | What did the technician actually see or measure? | Mixing observations and conclusions |
| Methods | What was tested and with what result? | Listing equipment without a result |
| Photos | What do they show and which finding do they support? | A gallery with no context |
| Conclusion | Which source is retained, and with what level of certainty? | A conclusion stronger than the evidence |
| Recommendations | What should happen next? | Mixing recommendations with completed actions |
| Completed actions | What was already done during the visit? | The reader cannot distinguish checking from repairing |
1. Identify the case
Include the information needed to find the case without ambiguity: address, client or requester, intervention date, report date, and any relevant reference.
If there were several visits, keep their dates whenever each one represents a different stage of the investigation.
In a shared building, the requester is not always the occupant met on site. It is therefore useful to distinguish the two.
2. Describe the reason for the visit without announcing the conclusion
The reason for the visit describes what was reported before your investigation.
Infiltration reported on the living-room ceiling during heavy rainfall.
This sentence places the problem without deciding where it comes from.
Avoid:
Leak coming from the upper terrace.
That wording may be correct at the end of the intervention, but it does not belong in the initial request if the source had not yet been established.
3. Distinguish the locations
In a building, the place where damage appears may be different from the place where the source is located.
Use explicit labels:
- affected location: where damage or symptoms are observed;
- source location: where the source is suspected or identified;
- location contact: the person to reach for that apartment or premises.
This distinction avoids ambiguous fields such as “claimant”, which may refer to a person, a property, or the damage itself depending on local habits.
4. Write the findings before interpreting them
A finding describes what is visible, measured, or relevantly reported.
Runoff marks visible above the window frame. Paint blistering over approximately 40 cm. No active water ingress observed during the visit.
The conclusion comes afterwards.
The findings point towards infiltration from the upper level.
This separation makes the reasoning readable and allows a third party to check what the conclusion is based on.
5. Link methods to their results
Naming a device is not enough.
Instead of:
Thermal camera.
write:
Thermal inspection carried out around the heating circuit: no localized thermal anomaly identified in the checked area.
A negative result can be useful if it explains why a hypothesis was ruled out.
6. Place photos where they are useful
A wide shot locates the area. A detail shows the defect. An annotation is useful only when it helps the reader identify something that is difficult to see.
Whenever possible, place the image next to the relevant finding rather than in an isolated gallery at the end of the report.
See also the guide on presenting and annotating photos when it is published.
7. Use the right level of certainty in the conclusion
The conclusion answers one simple question: what source can the investigation support?
An origin may be:
- identified;
- probable;
- compatible with the findings;
- undetermined at this stage.
The vocabulary should follow the available evidence, not the other way around.
8. Separate recommendations from completed actions
Conclusion: which source is retained?
Recommendations: what should happen next?
Completed actions: what was already done during the intervention?
Example:
Recommendation: repair the seal at the threshold, then carry out a new targeted water test.
Completed action: drainage openings cleaned during the visit.
Checklist before sending
Before exporting the PDF, check that:
- the case is identifiable;
- locations cannot be confused;
- facts are separated from hypotheses;
- each important method has a result;
- photos have context;
- the conclusion follows from the findings;
- recommended work is not presented as already completed.
To see this structure applied to a complete document, view the leak detection report template.
Untopo lets you capture these elements on mobile or desktop, then generate the PDF without rebuilding the layout manually.